How To Create ACF Flexible Content Field.
The steps below will guide you towards creating Flexible Content field layouts for your WordPress site.
Step 1: Create Flexible Content Field
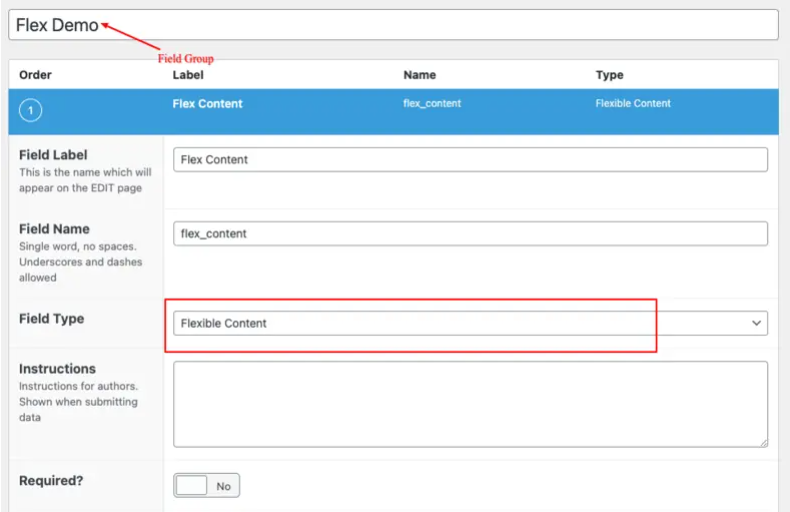
Start with creating a field group if not created yet, and then add a new field and set its type to Flexible Content.

Step 2: Create Layouts under the ACF Flexible Content Field Type.
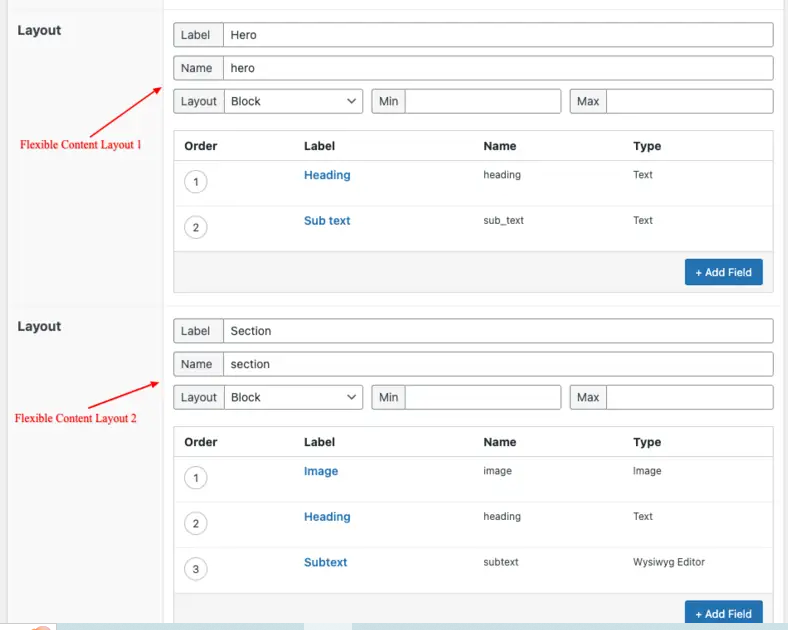
Under the ACF flexible content field type, you can add any number of layouts, each with its own set of fields.

For example, as you can see in the above screenshot, the flexible content field (Flex Content) contains two layouts (Hero & Section), each containing its own subfields.
Step 3: Additional Settings
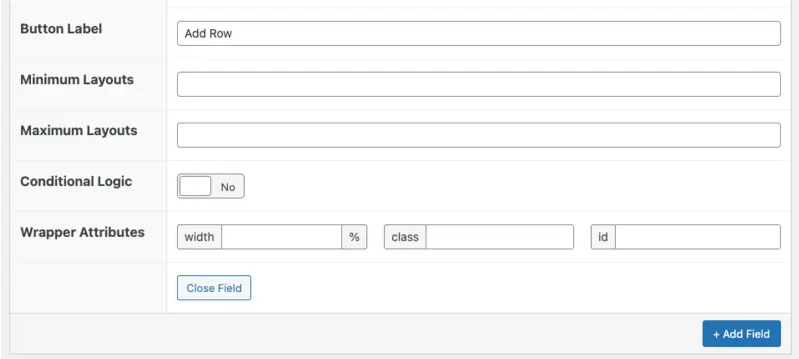
After adding layouts to the Flexible Content Field, you can configure a few additional settings related to how it appears when viewed in the Admin area.

- Button Label: The text is shown in the ‘Add Row’ button.
- Minimum Layouts: Sets a limit on how many layouts are required.
- Maximum Layouts: Sets a limit on how many layouts are allowed.
Step 4: Location Settings
Lastly, specify the location where you want to apply the flexible content field; if you have already assigned a location, you can skip this process.

Template usage
The ACF Flexible Content field returns a multi-dimensional array containing the layouts and their sub-field values.
Accessing the value is done via the have_rows, the_row, get_sub_field, and the_sub_field functions.
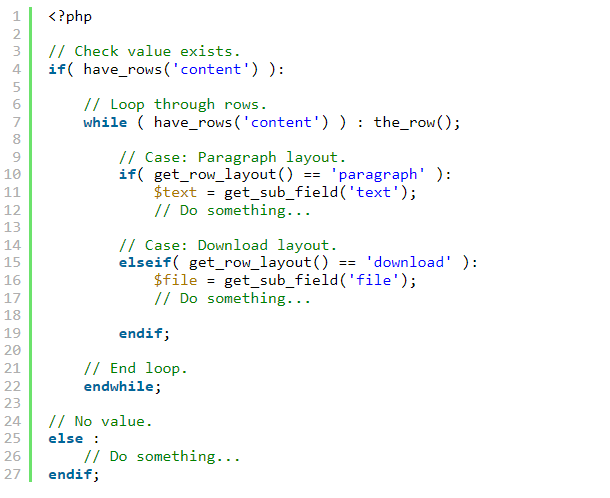
Loop example
This example demonstrates how to loop over an ACF Flexible Content field value and access subfields from different layouts.
